Given their changing humidity levels, bathrooms regularly face issues with mould. These ugly patches not only mar the pristine look of your tiles and grout but also pose potential health risks for you and your family. From respiratory problems to allergic reactions, ignoring mould can have serious consequences for the well-being of your household.
But what are you supposed to do? After all, mould can begin to grow on a damp surface within just 24 to 48 hours. Keeping your bathroom dry and clean to prevent mould growth isn’t always possible, so knowing how to remove black mould from the bathroom is essential for both health and aesthetic reasons.
Recognising Mould in the Bathroom
Mould can sometimes be a sneaky infestation, hiding in plain sight until it has taken hold of your bathroom. As you review your bathroom, be sure to review these tell-tale signs of mould:
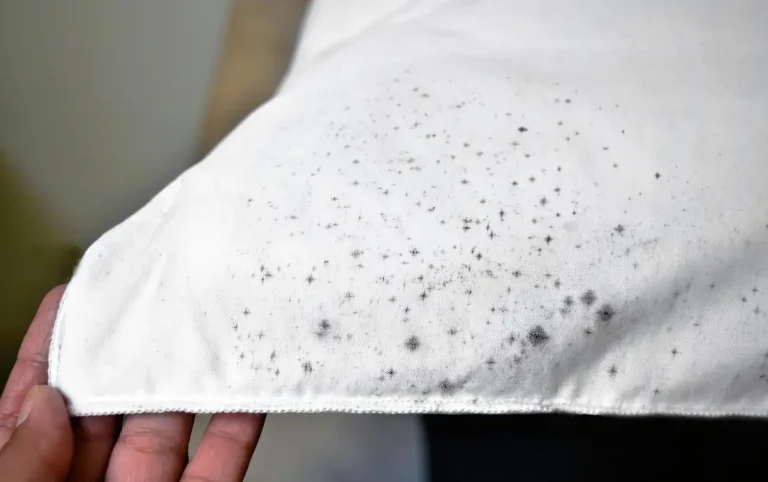
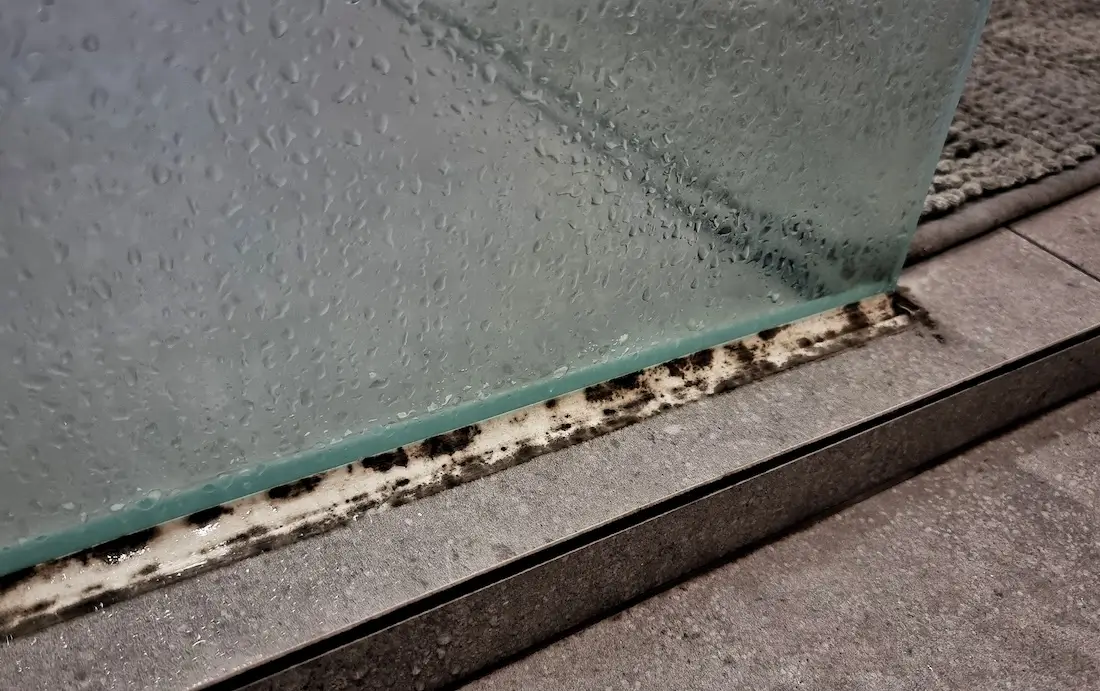
- Black Mould: The most notorious type of mould, black mould often appears as dark, slimy spots, commonly found on shower grout, wall corners, and silicone sealants. Keep an eye out for clusters of black dots that can spread and grow thicker over time.
- Pink Mould: You might notice pink or reddish stains along your shower curtain and bathtub. This type of mould thrives on soap residue and can often be found near the bottom of shower curtains and around the tub.
- Green Mould: Sometimes mistaken for algae, green mould grows in moist areas frequently exposed to water. You’ll often find it around sinks, in grout lines, and on bathroom walls with vinyl wallpaper.
- White Mould: Often powdery and mistaken for dust or mildew, white mould usually grows in less ventilated areas, such as behind sinks and around plastic or rubber fittings.
Always look closely at areas prone to moisture buildup, including:
- Silicone sealants around bathtubs and sinks
- Grout lines between tiles
- Shower curtains, especially at the bottom where water collects
- Behind and around bathroom fixtures and fittings
Removing Mould from Silicone and Sealants
Let’s begin by exploring how to remove mould from your bathroom, starting with the silicone around showers and sealants.
- Initial Assessment: Evaluate the severity of the mould. For example, do you need to remove black mould from the bathroom or another kind? Light mould can often be treated with simple remedies, while severe cases may require stronger solutions.
- Gather Supplies:
- Gloves
- Goggles
- N-95 mask
- Soft bristle brush or old toothbrush
- Non-abrasive sponge
- Hydrogen peroxide or white vinegar
- Commercial mould remover
- Spray bottle
- Paper towels or clean cloths
- Ventilation: Ensure the bathroom is well-ventilated by opening windows and turning on fans to reduce exposure to fumes from cleaning agents.
- Protect Yourself: Wear gloves, goggles, and an N-95 mask to protect yourself from mould spores and cleaning chemicals.
- Prepare the Cleaning Solution:
- For Light Mould: Mix equal parts water and white vinegar or use hydrogen peroxide. Pour the solution into a spray bottle.
- For Severe Mould: Use a commercial mould remover per the label’s instructions. Ensure it’s safe for use on silicone.
- Application:
- For Light Mould: Spray the vinegar or hydrogen peroxide solution generously on the affected areas. Allow it to sit for 10-15 minutes.
- For Severe Mould: Spray the commercial mould remover onto the mouldy areas, following the product’s specific guidelines. Let it sit for the recommended time.
- Scrubbing:
- Use a soft bristle brush or an old toothbrush to scrub the silicone and sealants gently. A non-abrasive sponge can be used for stubborn mould.
- Rinsing: Thoroughly rinse the scrubbed areas with warm water to remove any residue from the cleaning solution. Pat dry with paper towels or a clean cloth.
- Inspection: Check the area to ensure all mould has been removed. Repeat the process if necessary, especially in severe cases.
Removing Mould from Bathroom Fixtures
Looking how to remove mould from shower curtains, linings, grout and tiles?
Mould on Shower Curtains and Linings
Shower curtains and their linings are common victims of mould buildup, but don’t fret! Whether you have fabric or plastic curtains, here’s how you can address the issue.
For fabric shower curtains:
- Pre-treat with Baking Soda: Sprinkle baking soda on the mouldy areas and scrub gently with a brush.
- Machine Wash: Toss the curtain into your washing machine. Use hot water and add 1 cup of white vinegar along with your regular detergent.
- Dry Thoroughly: Air dry the curtain or tumble dry on a low setting. Ensure it’s completely dry before re-hanging to prevent further mould growth.
For plastic shower curtains:
- Wipe with Vinegar: Dampen a cloth with white vinegar and wipe down the mouldy spots.
- Deep Clean with Detergent: Place the curtain in the washing machine with a few towels (to act as scrubbers). Use mild detergent and 1 cup of baking soda.
- Rinse Cycle with Vinegar: Add 1 cup of white vinegar to the rinse cycle for extra disinfecting power.
- Air Dry: Hang the curtain to air dry completely before re-hanging in the bathroom.
Mould on Grout and Tiles
Moulding on grout and tiles is a common issue due to the consistent moisture in bathrooms. Here’s how you can tackle it and keep it at bay:
- Wear Protective Gear: Don rubber gloves, a mask, and safety glasses to protect yourself from harmful mould spores.
- Apply a Grout Cleaner or Mould Remover: Use a specialised grout cleaner or a mould remover like Clorox Tilex Mould and Mildew Remover spray.
- Allow the Cleaner to Sit: Let the product sit for the recommended amount of time (usually around 5-10 minutes) to penetrate and break down the mould.
- Scrub the Area: Use a stiff-bristled brush to scrub the grout and tiles thoroughly. Focus on the grout lines where mould tends to thrive.
- Rinse with Hot Water: After scrubbing, rinse the area with hot water to remove any remaining cleaner and dislodged mould.
- Dry the Area: Use a clean towel to dry the tiles and grout. Ensure the bathroom is well-ventilated to allow for faster drying.
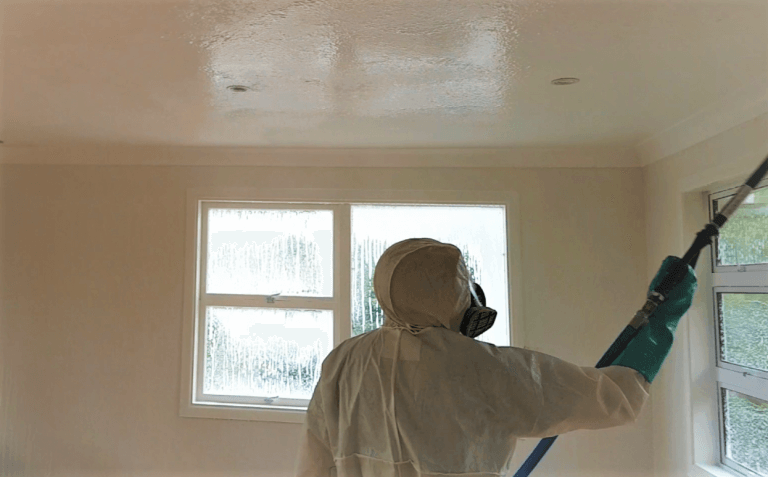
Mould on the Ceiling and Throughout the Bathroom
Knowing how to remove mould from the ceiling and throughout the bathroom can be challenging, but it is necessary for maintaining a healthy living environment. Follow these steps to effectively remove mould from your bathroom ceiling:
- Ensure Safety: Wear protective gear such as gloves, goggles, and a mask to prevent inhaling mould spores.
- Keep the Area Ventilated: Open windows and use a fan to circulate air and reduce humidity levels.
- Prepare a Cleaning Solution: Mix one part white vinegar with one part water or use a mould-killing cleaning product. Alternatively, you can use a bleach solution (1 cup of bleach in 1 gallon of water), but be cautious as bleach can be harsh and produce strong fumes.
- Apply the Solution: Use a spray bottle to apply the cleaning solution directly onto the mouldy areas of the ceiling.
- Scrub the Mould: Use a scrub brush or sponge to scrub the mouldy spots thoroughly. If too much mould accumulates on the sponge or brush, replace it.
- Rinse Thoroughly: After scrubbing, wipe down the area with a clean, damp cloth to remove any remaining mould and cleaning solution.
- Dry the Area: Use a dry cloth to wipe the surface or let it air dry completely. This step is crucial to prevent further moisture buildup.
Repeat these steps if necessary to ensure all mould is removed.

Keeping Your Bathroom Mould-Free
While it is helpful to know how to remove black mould from a bathroom ceiling or shower, prevention is always the best approach.
With that said, preventing mould in your bathroom involves consistent efforts in managing ventilation, cleaning routines, and moisture control. Here are some practical tips:
- Adequate Ventilation: Ensure your bathroom is well-ventilated. Open windows or use exhaust fans regularly to reduce humidity. Aim to air out the bathroom for at least 5 to 10 minutes after showers.
- Keep it Dry: Use a squeegee to dry shower doors, walls, and floors immediately after each use. This simple step can significantly reduce moisture levels.
- Regular Cleaning Routine: Clean your bathroom frequently using mould-inhibiting cleaners. Pay special attention to areas prone to moisture, such as the tub, shower, and sink.
- Control Humidity Levels: Use a dehumidifier to maintain indoor humidity levels below 50% to prevent mould spores from thriving.
- Fix Leaks Promptly: Address any leaks in the bathroom fixtures or plumbing immediately to avoid water accumulation, which can foster mould growth.
- Proper Venting for Appliances: Ensure that clothes dryers and bathroom fans vent outside to prevent excess moisture from being trapped indoors.
- Dry Towels and Mats: Always hang towels and bath mats to dry outside the bathroom. Damp fabrics can become breeding grounds for mould.
- Use Mould-Resistant Products: To create an extra barrier against mould development, opt for mould-resistant paint and caulking in your bathroom.
When to Seek Professional Mould Removal Services
Although you might now know how to remove black mould from your bathroom, there are situations where you need professional intervention. If you encounter any of the following scenarios, it might be time to call in the experts:
- If the mouldy area is larger than approximately 2 square feet, DIY methods may not suffice. Large infestations often indicate underlying moisture problems that need professional attention to correct.
- When dealing with contaminated water sources such as sewage, mould can be dangerous and require specialised cleaning and remediation techniques.
- If you have persistent mould issues that return despite your best efforts, this could suggest a bigger underlying problem that only a professional can diagnose and remediate.
- When the mould is found in hard-to-reach places, such as extensive growth behind walls or within HVAC systems, professional services have the tools and expertise to address these hidden infestations.
Restate offer a range of services that go beyond cleaning. We conduct thorough assessments, identify underlying moisture problems, and use advanced equipment to safely and effectively remove mould from your property.
Our expertise ensures that all affected areas are treated and the risk of future mould growth is minimised. Moreover, each of our professionals follows strict safety protocols to protect both the inhabitants and themselves during the remediation process.
Seeking the services of a professional mould removal company is an investment in the health and safety of your home and family. Offering mould restoration in Auckland, mould restoration in Hamilton, and beyond, we are ready to restore the integrity of your home.
Ensuring a Mould-Free Bathroom
A sparkling, clean bathroom is not only inviting but also reflects a healthy living space.
Maintaining a mould-free bathroom is not just about aesthetics; it’s crucial for your health and well-being. By keeping your bathroom free of mould, you can significantly reduce the risk of respiratory issues, allergies, and other health problems associated with mould exposure.
If you would like to discuss how to remove mould from your bathroom ceiling, shower and beyond, contact us today to learn more.